A full Bathroom Remodel Checklist in 2026 is less about flashy extras and more about comfort that lasts. Homeowners are prioritizing organic textures, calm color palettes (including the rising “Universal Khaki”), and layouts that feel open, clean, and easy to maintain. At the same time, wet rooms with seamless showers, floating vanities, and aging-in-place features are moving from luxury to mainstream because they improve daily use and future resale.
The listicle below follows a chronological, phase-based bathroom renovation checklist, from planning through final setup. Each step builds on the last, because sequencing is what protects new finishes, keeps inspections smooth, and reduces expensive rework.
Planning and Budgeting Phase
This essential phase involves setting the project timeline, along with defining budgets and key objectives.
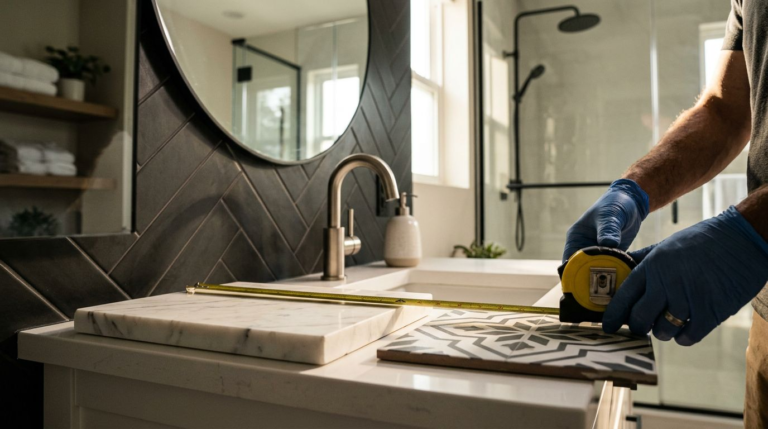
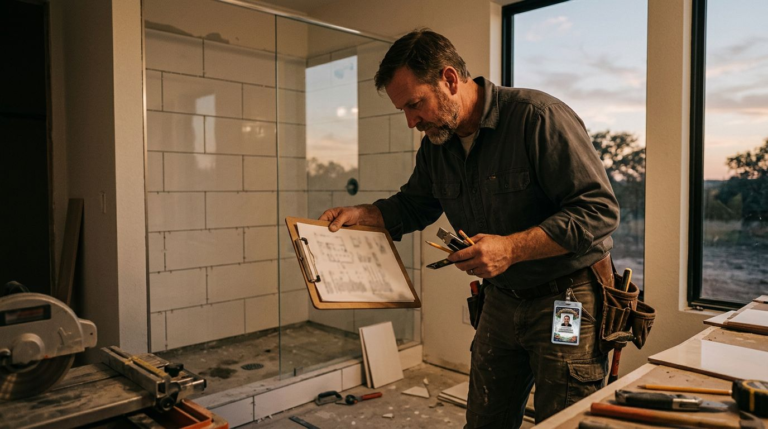
1) Document the existing bathroom like a job site
A bathroom renovation starts with clear records of what exists, not what’s assumed. Homeowners typically photograph every wall, the ceiling, the floor transitions, and all plumbing penetrations, then add basic measurements for vanity width, rough drain locations, and shower footprint.
This documentation helps later when walls open up and surprises appear. It also reduces confusion when comparing bids and ordering materials that must fit exact clearances.
2) Check for hidden damage and “can’t-ignore” repairs
Before style boards and tile samples take over, the room needs a reality check. Common findings in older bathrooms include slow leaks at the valve, soft subfloors at the toilet flange, failed caulk lines, and moisture behind shower tile.
Mold and water damage change scope quickly, so many remodel plans build in time and budget for what might be found once demolition begins.
3) Define remodel goals using a prioritized list
Clear goals keep the project from ballooning. Most homeowners separate needs from wants, then rank them so the budget has a backbone.
- Must-haves
- Mold-resistant ventilation plan
- Durable waterproofing in the shower, bathtub, or wet room
- Storage space that fits real routines
- Lighting fixtures that work for grooming
- Nice-to-haves
- Floating vanity
- Heated floor
- Smart mirror or defogger
- Niche shelving, integrated mirror, and upgraded trim details
This is also where “Organic Minimalism” fits best, because it favors fewer materials, fewer visual breaks, and calmer finishes that still feel warm.
4) Set a realistic budget with a labor-first view
A 2026 full bathroom remodel budget often lands in the broad $10,000 to $25,000 range for a mid-range, full tear-out, depending on size, location, and selections. However, the most consistent planning anchor is labor, which a general contractor commonly estimates to account for 40% to 65% of total cost once demolition, plumbing, electrical, tile, and carpentry are tallied.
Cost ranges vary widely by market and scope. For a current national overview, many homeowners reference 2026 bathroom remodel cost ranges.
5) Build a detailed budget breakdown, including a 20% contingency
A full remodel rarely stays within budget once walls open up. A 20% contingency fund often protects the project from hidden water damage, framing repairs, subfloor replacement, and code upgrades that appear during rough-in.
| Cost Category | Typical Share of Budget | What It Usually Covers |
|---|---|---|
| Labor | 40% to 65% | Demo, plumbing, electrical, tile, carpentry, paint |
| Fixtures | 10% to 20% | Toilet, valve set, showerhead, faucets |
| Tile and surfaces | 10% to 25% | Floor tile, shower tile, grout, trim pieces |
| Vanity and storage | 8% to 20% | Floating vanity, countertop, sink, hardware |
| Ventilation and lighting | 5% to 12% | Exhaust fan, ducts, recessed lights, vanity lights |
| Contingency | 20% (set aside) | Hidden damage, changes, delays |
Homeowners seeking value-focused planning often compare scope options alongside affordable bathroom remodeling approaches, especially when deciding where to spend and where to simplify.
6) Lock the 2026 design direction early (before ordering anything)
In 2026, bathroom renovation design trends point toward warm, grounded bathrooms that feel less sterile and more livable. “Universal Khaki” is showing up as a wall color, vanity finish, or tile undertone because it reads neutral without feeling cold. Organic Minimalism supports this trend with wood tones, stone looks, and fewer competing patterns.
For trend context from an industry source, many designers cite the NKBA 2026 bath trends report release.
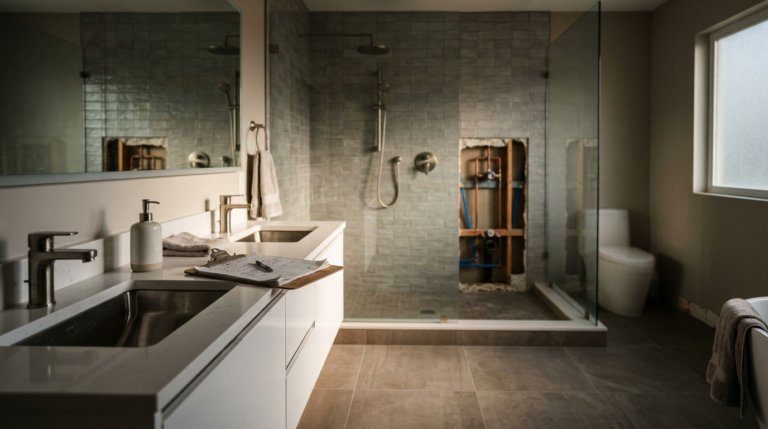
7) Plan the layout, with wet rooms and floating vanities in mind
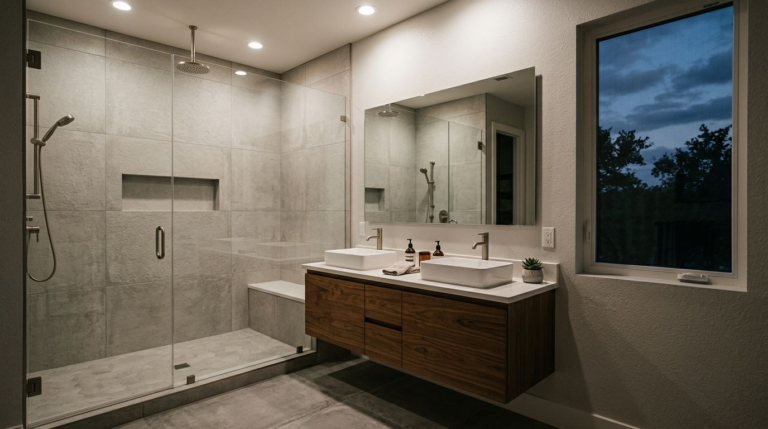
Wet rooms are gaining popularity because they simplify the shower and can make small bathrooms feel larger. When designed correctly, they also reduce curb edges and make cleaning easier. Floating vanities stay popular because they open sightlines and create a lighter footprint, especially when paired with under-vanity lighting.
Layout planning also benefits from thinking in “traffic lanes,” not just fixture placement. Door swing clearance, towel reach, and daily storage access often matter more than an oversized bathtub that rarely gets used and takes up space better suited for a larger shower.
8) Include aging-in-place features as high-ROI upgrades
Aging-in-place improvements are no longer niche. Curbless shower entries, wider doorways, and blocking for future grab bars can improve safety now while protecting resale value later. Related hardware like a towel bar also supports accessibility without compromising style. These elements integrate cleanly with Organic Minimalism because they don’t need to look clinical.
In many remodels, the best time for these upgrades is framing, not after tile is installed.
9) Confirm building permits, inspections, and core code requirements
Bathrooms touch multiple regulated systems. When plumbing moves, electrical circuits change, or ventilation ducting is altered, many jurisdictions require permits and inspections.
Most full remodel scopes include:
- Plumbing rough-in and final
- Electrical rough-in and final
- Exhaust fan venting compliance
- Shower pan and waterproofing requirements (varies by area)
10) Choose the right mix of pros and DIY tasks
Full remodels involve risk-heavy systems. Many homeowners hire licensed pros for plumbing and electrical, then handle low-risk tasks like painting, medicine cabinet installation, or hardware installation if time and skill allow.
Those looking to compare local project support often start with bathroom remodeling near me when evaluating a general contractor who can manage a full, start-to-finish scope.
Demolition Phase
11) Prep the home before demolition starts
A clean demolition plan protects the rest of the home. Typical prep includes dust containment at doorways, floor protection in hallways, and a debris strategy for heavy floor tile and drywall.
Utility shutoffs are also part of the plan, so demolition doesn’t turn into an emergency call. This is especially important when older shutoff valves fail under stress.
12) Demo in a controlled sequence, then inspect immediately
Demolition usually begins with fixtures, then finishes, then drywall. Once walls are open, the framing, insulation condition, and plumbing runs become visible, which is when hidden water damage is confirmed.
Documenting what’s found helps control scope. It also supports faster change orders if materials must shift to accommodate repairs.
Rough-In Phase (Plumbing and Electrical)
13) Rough-in plumbing with function and maintenance in mind
Plumbing decisions set the bathroom’s “daily feel.” Proper faucet placement, valve height, showerhead location, handheld placement, and sink drain alignment affect usability for years.
Low-flow fixtures remain common for water savings, but homeowners also prioritize stable temperature control and serviceable access panels where needed. When a layout shifts for a wet room or curbless shower, drainage planning becomes even more important.
14) Rough-in electrical with safety as the baseline
A bathroom needs enough electrical power for modern routines, plus code-compliant protection. GFCI outlets are a must-have near water sources, and layers of lighting fixtures matter more than a single fixture.
Common 2026 additions include:
- Dedicated outlet placement for toilet bidet seats
- Vanity outlets that don’t block drawers
- Wiring for smart mirrors and mirror defoggers
- Optional floor-warming circuits (when feasible)
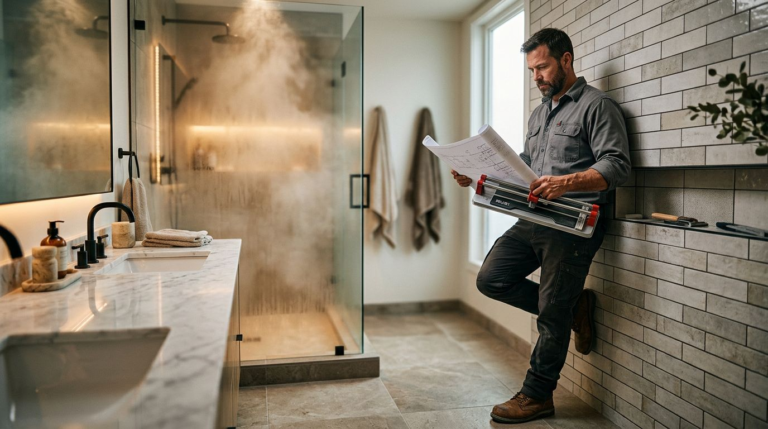
15) Size ventilation for moisture control, not noise alone
Mold prevention starts with moving humid air out fast. High-CFM exhaust fan options are popular because they clear steam quickly, especially in busy households or bathrooms with limited natural ventilation.
Many projects also include humidity-sensing controls or timers so the fan runs long enough to protect grout, paint, and framing.
For broader consumer trend coverage, publications tracking 2026 styles often note wellness and comfort features, including ventilation and spa-like layouts, in roundups like 2026 bathroom trend highlights.
Waterproofing Phase
16) Follow the “top-down” rule to protect new surfaces
The most reliable sequence works from the ceiling down to the floor. Ceiling work and overhead electrical finish first, then wall substrates, then waterproofing, then tile and floors last. This sequence reduces the risk of damaging new floor tile with ladders, thinset, and dropped tools.
It also keeps dust and debris from settling into fresh grout lines late in the build.
17) Use a system-based shower waterproofing approach
Waterproofing is a system, not a single product. Many 2026 remodels call for Schluter-Kerdi waterproofing systems in shower assemblies because they’re designed as integrated components (membrane, banding, drains, and corners).
This step is where wet rooms either succeed or fail long-term. Consistent overlaps, properly sealed penetrations, and correct plumbing drain integration matter more than tile choice.
18) Choose wall substrates built for wet environments
Bathrooms punish standard materials. Cement board or other approved backer systems in wet areas reduce risk, and moisture-resistant drywall can work in non-wet zones when used correctly.
Sound control also fits here. Insulation and sound-damping in shared walls can make a primary bath feel calmer, especially when paired with quiet ventilation fans and soft-close cabinetry.
Finishing Phase (Floor Tile, Grout, Paint, Trim)
19) Install flooring with slip resistance and long-term care in mind
Flooring decisions often blend style, safety, and cleaning effort. Porcelain floor tile remains a common pick for durability, while some homeowners choose high-quality vinyl floor tile in lower-moisture baths for warmth underfoot.
Heated floors continue to trend in 2026, particularly in primary suites. They pair well with floating vanities because the open toe-kick area under the sink helps distribute warmth visually and physically.
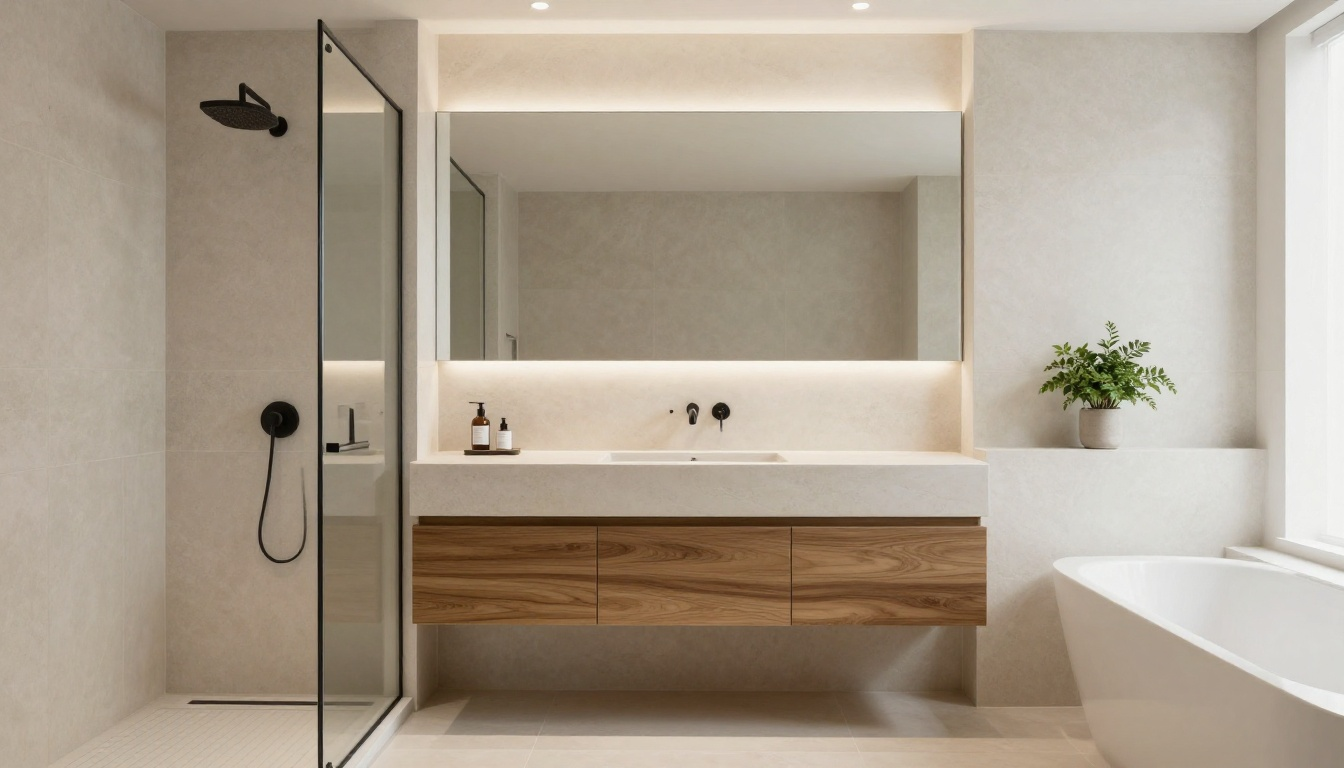
20) Tile walls with fewer grout lines, cleaner sightlines
Organic Minimalism shows up strongly in tile choices. Larger-format wall tiles, vertical stacking, and calm stone looks reduce visual clutter from grout. In showers, niches and benches remain popular, but they require careful waterproofing continuity.
Many wet rooms also use continuous floor tile into the shower zone with a controlled slope to the drain, which creates the open, modern look homeowners want without sacrificing function.
21) Paint and trim with moisture resistance as the goal
Bathrooms need finishes that tolerate humidity cycles. Mold-resistant primers, bathroom-rated paints, and moisture-resistant caulk reduce peeling and spotting, especially in homes where showers run back-to-back.
Color is also where “Universal Khaki” can shine, because it pairs well with warm whites, natural wood, and brass faucets or champagne-toned metals.
Fixture Install Phase (Cabinetry, Vanity, Plumbing Trim, Glass)
This phase covers the installation of key elements like the sink, along with cabinetry, plumbing trim, and glass components.
22) Install the vanity, then finalize storage and lighting coordination
Floating vanities are popular for a reason, they improve cleaning access and make compact bathrooms feel less crowded. However, they require proper wall blocking and careful height planning so the sink and mirror align comfortably.
Homeowners planning a primary suite upgrade often compare vanity layouts and storage space strategies within master bathroom remodeling Denton TX project examples, especially when deciding between double-sink setups and wider single-sink countertops.
23) Set the toilet, then test performance and sealing
Toilet installation is simple on paper but sensitive in real life. Plumbing like flange condition and supply line connections, along with floor flatness and sealing, determine whether the installation stays leak-free. Many remodels also upgrade comfort height and consider bidet seats, which may require a nearby outlet planned during rough-in.
24) Finish the shower or tub zone, including glass and trim details
This is where the bathroom starts to look complete. Shower trim, including the faucet, valve covers, heads, handhelds, and glass enclosures all go in after tile cures and waterproofing integrity is protected. Install the towel bar as a final accessory in this zone.
Wet rooms often use fixed panels rather than full enclosures to maintain openness, especially in tub-shower combos with a bathtub. That choice makes the earlier drainage and ventilation steps even more important.
25) Run final inspections, then complete a tight punch list
A full remodel ends with verification, not vibes. Final checks typically include:
- Plumbing leak testing at valves, traps, and supply connections
- Electrical GFCI function testing
- Fan operation and exterior vent confirmation
- Door swings, drawer clearance, and hardware alignment
- Caulk lines at change-of-plane joints
Many homeowners keep a checklist format similar to bathroom remodel checklist to track what’s complete versus what needs touch-ups.
Conclusion: A 2026 full remodel succeeds when the sequence stays disciplined
A full bathroom renovation in 2026 blends trend-forward design with behind-the-wall discipline. Universal Khaki and Organic Minimalism help the space feel warm and calm, while wet rooms and floating vanities improve day-to-day function. Still, the long-term win comes from fundamentals like Schluter-Kerdi waterproofing for the shower, GFCI protection, and high-CFM ventilation, completed in a top-down sequence that protects new finishes.
To keep the schedule stable, homeowners often order long-lead items (custom vanities, specialty tile, and glass) at least 8 to 12 weeks before demolition starts.